Click here to download

A bit about the drawdio

Take a piece of paper and turn it into your very own musical instrument with our version of the drawdio which takes this humble musical synthesizer to the next level! This meticulously thought out drawdio kit stands out from the rest as it contains an 8b graphite pencil which draws thick smooth lines making the need to painstakingly go over and over your lines a thing of the past!
For those who are not already familiar with the Drawdio it was originally designed by Jay Silver and uses the conductive properties of the graphite in a pencil to create different musical sounds.


What’s included in your kit

Please open the packaging carefully and check that all parts are present and correct using the parts list below before you start.

Drawdio PCB                               1

8 Ohm speaker                           1

2N4403 PNP transistor             1

555 timer IC                                 1

680p Ceramic capacitor            1

0.1u Ceramic capacitor             1

100u Electrolytic capacitor     1

10R Resistor                               1

10k Resistor                               1

300k Resistor                             1

20M Resistor                              1

AAA battery holder                   1

200mm sticky back copper foil

(approximately)

8b graphite pencil                         1

Cable ties                                        2

Sticky pads                                     2

40mm wire (approximately)       1

let's get started!!

You Will Need:

Soldering Iron

Solder

Wire cutters (flush preferably)

AAA battery

Scissors

Place and solder all of the resistors and non-polarised capacitors (0.1uF and 680pF)

Note: Non-polarised capacitors and resistors can be put in the circuit without worrying about their orientation.

300k (orange-black-black-orange-brown)

10k (brown-black-black-red-brown)

10r (brown-black-black-gold)

20m (red-black-blue-gold)

Be sure to cut the legs on the underside short after soldering. This will ensure that there are no short circuits when attaching the board to the graphite pencil.

Place and solder the 100uF electrolytic capacitor with the longest leg in the hole nearest the ‘+’ and the white stripe on the capacitor nearest the ‘SPK+’.

Note: Polarised capacitors should be put in circuit the right way around with the negative terminal connected to the lower potential.

Place the PNP transistor 2N4403 oriented to match the silkscreen taking care to push it as close to the PCB as possible before soldering.

Place the timer chip with pin 1 indicated by the circle on top of the package towards the notch indicated in the silkscreen.

Solder the speaker with the red wire to the SPK+ terminal and the black wire to the SPK- terminal.

Solder the AAA battery holder as close to the top of the components as possible, ensuring the + terminal is located in the ‘AAA+’ hole and the – terminal in the ‘AAA-‘hole.

At this point your drawdio should be looking something like this!

Attach sticky pads to the underside of the PCB.

Thread the cable ties through the holes in the PCB and then between the PCB and battery holder.

Carefully wrap the wire around the notch in the pencil once, as tight as possible so it’s snug.

Note: This is an important step because the wire must have contact with the graphite to complete the circuit.

Next stick the pencil to the sticky pads with the wire carefully aligned with the upper pad on the PCB.

Note: The sticky pads help keep the pencil and PCB together and also insulate the PCB from the pencil.

Carefully wrap the copper tape around the pencil until close to the end. If the tape is too long simply tear or trim off the excess.

Note: The copper tape should not be in contact with the graphite. To avoid this when sharpening simply lift and trim the copper tape to size.


Congratulations, you are now the proud owner of a drawdio! Pop in an AAA battery, grab some paper and start making some noise!


Getting Started

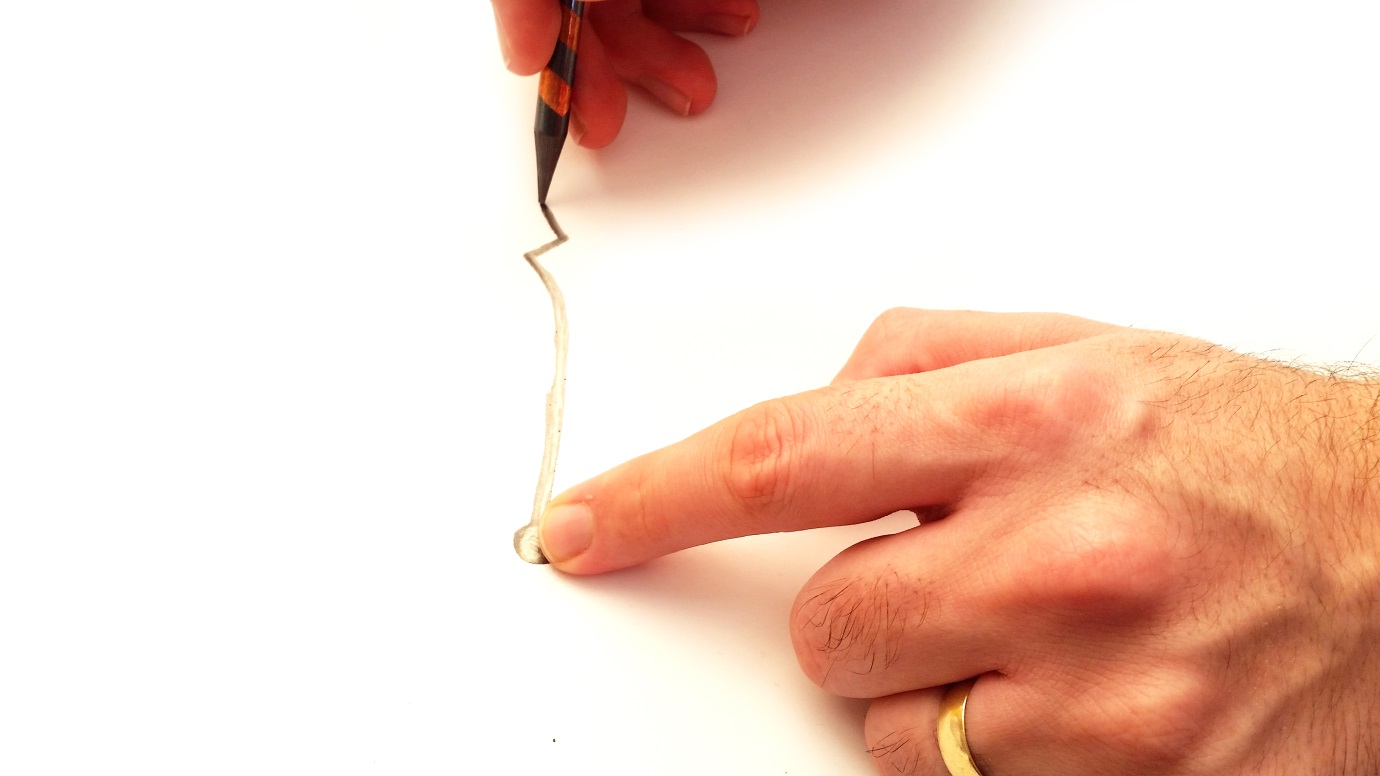
To use your drawdio pencil, draw a large dot as shown above for one finger to sit on and draw away from it making any shape you like. The finger sitting on the dot completes the circuit through the body (this is completely harmless of course) connecting with your other hand which is touching the copper tape on the pencil. You could perhaps start with a straight line to get a feel for how it works.  Once you have a line drawn, touch it at different intervals or run along it with the tip of the pencil to get sounds with different frequencies/notes. If you don’t get sound the first time, experiment with drawing the lines thicker, thinner, shorter and longer to discover how it works best for you. Generally the longer the line is the larger the range of notes is starting with lower frequency closer to the touch dot and getting higher the further away it is. Similarly the wider and heavier the line (thus the conductivity of the graphite) is, the higher pitch the frequency. For even more fun you can swap and hold the pencil on the dot and use your finger to run along the line!